
How to cast off knitting you have worked hard on your knitting project. The rows are done. Now you need to get those stitches off the needles cleanly and permanently. That final step is called casting off, and this guide walks you through everything from the basic method to specialty techniques that will level up your finished projects.
Whether you are a total beginner or you have been knitting for years, this guide covers every cast off method you need to know and tells you exactly when to use each one.
What Does Casting Off Mean in Knitting
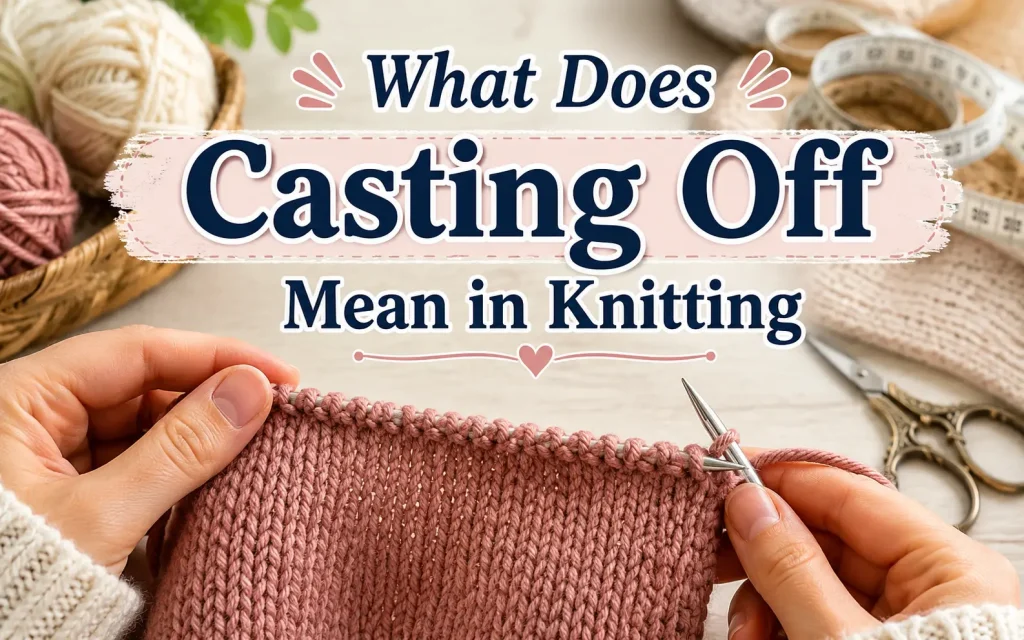
Casting off (also called binding off) is the process of securing your live stitches so they cannot unravel once you remove your knitting needles. It creates a finished edge along the top of your work.
Think of it as the closing seal on everything you have knitted. Without a proper cast off, your stitches will simply slide off the needle and the whole piece will unravel.
The cast off edge matters more than most beginners realise. A tight cast off can pucker the fabric and make a garment feel stiff at the neck or cuff. A loose cast off can look sloppy and uneven. Choosing the right method for your project is just as important as any other knitting decision.
What You Need Before You Start
Before casting off, have these items ready:
- Your knitting needles with your live stitches on them
- A pair of scissors
- A tapestry needle or darning needle for weaving in the yarn tail
- Your working yarn attached to the project
Optional but helpful: a needle one size larger than the one you used for the project. Using a slightly larger needle when casting off helps keep the edge loose and elastic.
How to Cast Off Knitting: The Standard Method (Step by Step)
This is the most common cast off method. It works for scarves, blankets, dishcloths, and most beginner projects knitted in garter stitch or stockinette.
Step 1: Knit the First Two Stitches
Start at the beginning of a new row. Knit the first two stitches from your left needle onto your right needle, keeping your tension loose. You should now have two stitches sitting on your right needle.
Keep a relaxed grip throughout. This is the most important tip for a neat cast off edge. Tension that is too tight will cause the edge to pucker.
Step 2: Pass the First Stitch Over the Second
Insert the tip of your left needle into the first stitch on the right needle (the one closest to the needle tip). Lift that stitch up and over the second stitch and completely off the right needle. One stitch has now been cast off.
Step 3: Knit One More Stitch
Knit one stitch from the left needle onto the right needle. You again have two stitches on the right needle.
Step 4: Repeat Until One Stitch Remains
Continue repeating Steps 2 and 3 across the entire row. Each time you pass a stitch over, one more stitch is secured. Keep going until you have just one stitch left on your right needle.
Step 5: Secure the Last Stitch
Cut your yarn, leaving a tail of at least 15 to 20 cm (about 6 to 8 inches). Thread that tail through the final stitch and pull it snug. This locks the last stitch in place.
Step 6: Weave in the Yarn Tail
Thread your yarn tail onto a tapestry needle. Weave it through the backs of several nearby stitches to secure it, then trim the excess. Your project is now fully cast off and finished.
The Golden Rule of Casting Off: Stay Loose
Every experienced knitter will tell you the same thing: the biggest mistake beginners make is casting off too tightly. A tight cast off edge is stiff, restrictive, and in the case of necklines or cuffs, it can make a garment unwearable.
Two ways to keep your cast off loose:
- Consciously slow down and leave extra slack between each stitch as you work
- Switch to a knitting needle one or two sizes larger just for the cast off row
If you have already cast off too tightly and your edge is puckered, your best option is to carefully unravel the cast off row, return to the live stitches, and redo the cast off with a larger needle and a looser hand.
How to Fix the Last Stitch Problem
The last stitch in a standard cast off often looks larger or more elongated than the rest of the edge. This is a known issue and it has a simple fix.
When you reach the final stitch, instead of simply threading the yarn through it, do the following: lift the stitch directly below the last stitch on your left needle and knit it together with the last stitch before casting it off. This creates a neater, more even final corner.
7 Specialty Cast Off Methods (And When to Use Each One)
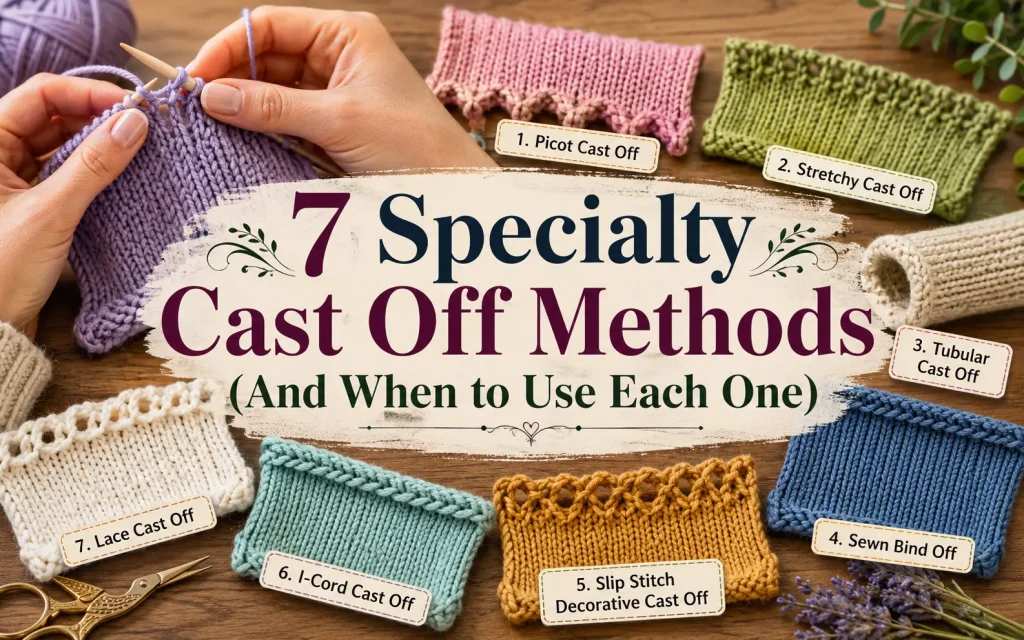
The standard cast off is great for many projects, but knitting produces many different fabrics, each of which benefits from a specific cast off technique. Here is a breakdown of the most useful specialty methods.
1. Purlwise Cast Off
Use this when your last row before casting off is a purl row, or when you want a cast off that sits consistently on the wrong side of the fabric.
The method is identical to the standard cast off except you purl every stitch instead of knitting them. The result is a mirror image of the standard bind off.
2. Stretchy Ribbing Cast Off (Jeny’s Surprisingly Stretchy Bind Off)
Use this for any project with ribbing at the edge, especially sock cuffs, hat brims, and necklines.
The standard cast off creates a firm, inelastic edge that simply does not work for ribbing. Jeny’s method adds a yarn over before each stitch, which creates dramatically more stretch while keeping the edge neat and defined.
For a knit stitch: make a reverse yarn over, knit the stitch, then pass both the yarn over and the previous stitch over the new stitch.
For a purl stitch: make a forward yarn over, purl the stitch, then pass both the yarn over and the previous stitch over the new stitch.
3. Italian Tubular Cast Off
Use this for 1×1 ribbing on high-end garments such as sweater necklines, hat brims, and sock cuffs where you want the most polished possible finish.
This method uses a tapestry needle rather than knitting needles and mirrors the structure of an Italian cast on. The result is virtually invisible and extremely elastic. It requires a yarn tail that is at least four times the width of the cast off edge.
The technique alternates between entering stitches purlwise and knitwise in a specific sequence. It takes some practice but produces a professional result that no other method can match for ribbing.
4. Three Needle Cast Off
Use this for joining two sets of live stitches together, most commonly for shoulder seams in sweaters.
Hold both needle tips parallel with right sides facing each other. Insert a third needle knitwise through the first stitch on each needle simultaneously and knit them together. Then pass the first stitch over the second as in a standard cast off. The result is a cast off that simultaneously joins and finishes two edges in one step.
5. Icelandic Cast Off
Use this for garter stitch or seed stitch borders when you want a cast off that blends seamlessly into the textured fabric.
The Icelandic cast off creates an edge that closely matches the appearance of garter or seed stitch, making it nearly invisible. It works particularly well on blankets, shawl edges, and any project where the cast off edge should look like just another row of fabric.
6. No Curl Cast Off
Use this when casting off a stockinette edge that tends to roll.
Stockinette naturally curls at the edges because of the tension difference between knit and purl stitches. The no curl cast off works one stitch below the current stitch on the needle, incorporating the row below into the bind off. This counteracts the curl and gives a flat, clean finish without requiring a border of garter or ribbing.
7. Picot Cast Off
Use this for decorative edges on baby garments, shawls, and lacework.
A picot cast off creates small loops or points along the edge that give a delicate, ornamental appearance. Between each picot, you briefly cast on two stitches using the knitted cast on and then immediately cast them off along with the existing stitches. The distance between your picots controls how prominent the decorative loops appear.
8. I-Cord Cast Off
Use this when you want a neat, rounded, cord-like border on the edge of your project, such as the front bands of a cardigan or the edge of a blanket.
You cast on two to four extra stitches at the beginning of the edge. Then you knit those stitches, work a k2tog with the next stitch from the project, and slide all the stitches back to the left needle. Repeat across the entire edge. The result is a clean, tubular border that frames the project without any additional finishing.
Casting Off in Different Stitch Patterns
Casting Off in Rib Stitch
When casting off in rib, match your cast off stitches to the stitch pattern below them. Knit the knit stitches and purl the purl stitches as you work across the row. This keeps the edge flexible and prevents the ribbing from pulling in.
For the best result on ribbed edges, use Jeny’s Surprisingly Stretchy Bind Off or the Italian Tubular Cast Off rather than simply ribbing the stitches while casting off in the standard way.
Casting Off in Seed Stitch
Follow the same principle as ribbing. Alternate between knit and purl as dictated by the seed stitch pattern. The Icelandic cast off is also an excellent choice for seed stitch.
Casting Off in Garter Stitch
The standard cast off works perfectly well for garter stitch. However, the Icelandic cast off blends in even more naturally if you want a truly seamless edge.
How Much Yarn Do You Need to Cast Off
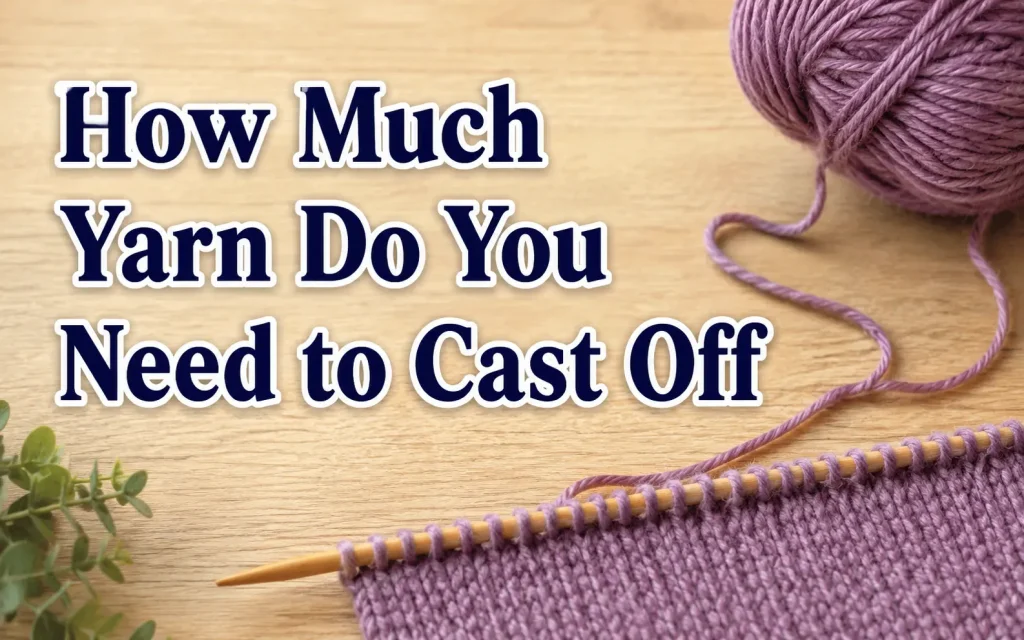
A common beginner mistake is running out of yarn mid-cast-off. A rough guideline: the standard cast off uses approximately one to one and a half times the width of your knitting in yarn. However, heavier yarn and looser tension will use more.
For sewn methods like the Italian tubular cast off, leave a tail at least four times the width of the edge you are casting off.
If you are not sure you have enough yarn, lay the tail across the top of your knitting and fold it back and forth across the width three times. If the yarn runs out before three full widths, you may not have enough. In that case, consider carefully unraveling one or two rows to free up more yarn before beginning your cast off.
Casting Off in the Round
When you finish a hat or any other project knitted in the round, you have two options for closing the top:
The standard method for hats: cut the yarn leaving a 20 cm tail, thread it onto a tapestry needle, and pass it through each remaining live stitch. Slide the stitches off the knitting needle as you go, then pull the yarn tail to cinch the opening closed. Weave in the end securely.
The Kitchener stitch (grafting) method: used for sock toes and any situation where you want a completely seamless join between two sets of live stitches. The resulting seam is invisible and perfectly elastic.
Common Cast Off Mistakes and How to Avoid Them
Too tight: The most frequent problem. Always keep a relaxed grip and consider going up a needle size for the cast off row.
Running out of yarn: Estimate your yarn needs before starting and free up more yarn from a previous row if needed rather than risking running out midway.
Forgetting to weave in the tail: A cast off tail that is simply tied off can work itself loose over time. Always use a tapestry needle to weave the tail through at least four or five stitches before trimming.
Casting off on the wrong side: If your pattern specifies casting off on the right side or wrong side, follow that instruction. Casting off on the wrong side pushes the cast off ridge to the back of the work, which looks neater on many garments.
Casting off too early: Always make sure you are on the correct row according to your pattern before casting off. Casting off one row too early on a shaped piece can throw off the entire garment.
Quick Reference Which Cast Off to Use
| Project Type | Best Cast Off Method |
|---|---|
| Scarf or blanket | Standard cast off |
| Hat brim or sock cuff | Jeny’s Stretchy Bind Off |
| Sweater neckline | Italian Tubular Cast Off |
| Shoulder seam | Three Needle Cast Off |
| Shawl or lace edge | Picot Cast Off |
| Garter or seed stitch border | Icelandic Cast Off |
| Cardigan front band | I-Cord Cast Off |
| Stockinette edge (to prevent curl) | No Curl Cast Off |
FAQs
What does cast off mean in knitting?
Casting off, also known as binding off, is the process of securing the final row of stitches so they do not unravel when your knitting project is finished.
How do you cast off knitting for beginners?
To cast off, knit the first two stitches, then use the left needle to lift the first stitch over the second stitch and off the needle. Knit another stitch and repeat until only one stitch remains.
Is casting off the same as binding off?
Yes, casting off and binding off are the same technique. “Cast off” is commonly used in the UK, while “bind off” is more common in the US.
How tight should I cast off knitting?
Your cast-off edge should be firm enough to hold the stitches securely but loose enough to maintain the fabric’s stretch and shape.
What happens if I cast off too tightly?
A tight cast-off edge can make the finished piece less stretchy and may cause it to curl or distort, especially around necklines and cuffs.
Can I cast off in pattern?
Yes, many knitters cast off in pattern by knitting the knit stitches and purling the purl stitches as they appear in the row.
How do I finish the last stitch when casting off?
After casting off all stitches, cut the yarn, leaving a short tail. Pull the tail through the final loop and tighten gently to secure it.
Final Thoughts
Casting off is one of those knitting skills that feels tricky the first time and completely natural after just a few tries. The standard method is all you need to finish most beginner projects, and once you are comfortable with it, exploring the specialty methods opens up a whole new level of polish and professionalism in your finished knitting.
The most important things to remember: stay loose, choose the right method for your fabric, and always weave in your ends properly. Do those three things and your cast off edge will look clean and professional every time.